We walked the local MS Walk in Milwaukee this morning. 3.5 miles after a winter spent hibernating had me dragging my bottom towards the end. I had to motivate myself to put one foot in front of the other... Pathetic! I know we will get there... This was just a wake up call. Time to start walking EVERY nice day outside and every crappy day inside. Let the training begin! CHALLENGE WALK 2013... I'M UP TO THE CHALLENGE!
-eem
PS: The walk is really in Door County, but Green Bay was the closest city the countdown program recognized.
Sunday, May 5, 2013

Thursday, April 25, 2013
Victory Garden
This year I am putting in a raised garden, actually I am taking part in the Victory Garden Initiative in the greater Milwaukee area. A group of volunteers will come to our yard and put in the raised garden. There is a fee associated with the garden, not too much in my estimation, and they fill the raised garden with organic soil. They even offer mentors to new gardeners, or old gardeners who need some advice.
Here's the link if you're interested. You have to sign up by May 4, so hurry on over if you want to get in on the action.

I think I may have mentioned this before, but we've gone Gluten Free at our house. It all started just over 3 years ago when my right hand started to hurt when I tried to open jars, hold the steering wheel of my car or even write. I rested, iced, compressed and elevated to no avail. I even quit knitting for over a year, no help. Then my doctor advised that I try eliminating inflammatory foods from my diet. What are those? Sugars and Gluten can cause inflammation in some folks. Other foods that may trigger inflammation are dairy and nuts. So I jumped in and did a 21 day cleanse, eliminating all of the above along with meat and fish for the first 10 days. Besides getting immediate relief in my hands (4 days in) my daily heartburn went away. I also found I had lots more energy and I was sleeping through the night.
After the 21 days I brought back dairy first, no reaction. Then nuts, no problem there either. I decided to avoid sugars as much as possible even though I do not have a reaction to sugars either. It was gluten, the very first time I tried gluten my heartburn returned and the soreness in my hands soon followed. That sensation left me within 24 hours, but I didn't want to go back. Daily pain is...you know...a pain.
So we cleaned out house out of gluten foods. We read every label and found gluten aka WHEAT in weird stuff, like soy sauce, ketchup along with the foods that are composed out of wheat like noodles and breads.
We eat a lot more veggies these days and we are happier. I'm excited that we are putting in a garden so we can pick our own produce.
I will post pictures as we go along.
~mpr
Here's the link if you're interested. You have to sign up by May 4, so hurry on over if you want to get in on the action.

I think I may have mentioned this before, but we've gone Gluten Free at our house. It all started just over 3 years ago when my right hand started to hurt when I tried to open jars, hold the steering wheel of my car or even write. I rested, iced, compressed and elevated to no avail. I even quit knitting for over a year, no help. Then my doctor advised that I try eliminating inflammatory foods from my diet. What are those? Sugars and Gluten can cause inflammation in some folks. Other foods that may trigger inflammation are dairy and nuts. So I jumped in and did a 21 day cleanse, eliminating all of the above along with meat and fish for the first 10 days. Besides getting immediate relief in my hands (4 days in) my daily heartburn went away. I also found I had lots more energy and I was sleeping through the night.
After the 21 days I brought back dairy first, no reaction. Then nuts, no problem there either. I decided to avoid sugars as much as possible even though I do not have a reaction to sugars either. It was gluten, the very first time I tried gluten my heartburn returned and the soreness in my hands soon followed. That sensation left me within 24 hours, but I didn't want to go back. Daily pain is...you know...a pain.
So we cleaned out house out of gluten foods. We read every label and found gluten aka WHEAT in weird stuff, like soy sauce, ketchup along with the foods that are composed out of wheat like noodles and breads.
We eat a lot more veggies these days and we are happier. I'm excited that we are putting in a garden so we can pick our own produce.
I will post pictures as we go along.
~mpr
Sunday, March 31, 2013
Hippity Hoppity... Natural Dyed Eggs
Last Sunday my mom and I attended Swiecone for my cousin Pat's Polish Syrenna Dancers. Each Palm Sunday they throw a feast as a fundraiser for they cultural dance group. The food is always delicious and the dancing never disappoints! I enjoy the homemade sauerkraut with bacon and caraway seeds! AMAZING! Although we are not Polish, we enjoy this event and the company of Pat's family and especially his wife Stephanie, who is my favorite cousin that lives in St. Francis. :)
One thing that I also enjoy is the cultural history that the even provides. They bless the food in Polish tradition and serve eggs as part of the blessing. They also share ways to dye eggs naturally, something I thought I would share with you today.
Foods that naturally dye eggs-
Red- beets, cranberries or red onion skin
Blue- blueberries
Yellow- yellow onion skin or lemon zest
Orange- orange zest or carrots
Green- spinach
I chose blueberries, the frozen kind, that at some point my mom or I spaced and put them in the fridge instead of the freezer and I found them yesterday morning and went... DOH! I had about a 1/4 of a cup left and didn't want to waste them, so out came the eggs to dye naturally.
Here is the process...
Submerge your eggs in water, add 2 TBS vinegar, a hearty amount of salt and the blueberries. Smash up the blueberries to add more juice/dye to the water. Bring the water to a boil, cover and let sit for 20 minutes. Voila! Naturally dyed eggs!
Pictures to come soon!
One thing that I also enjoy is the cultural history that the even provides. They bless the food in Polish tradition and serve eggs as part of the blessing. They also share ways to dye eggs naturally, something I thought I would share with you today.
Foods that naturally dye eggs-
Red- beets, cranberries or red onion skin
Blue- blueberries
Yellow- yellow onion skin or lemon zest
Orange- orange zest or carrots
Green- spinach
I chose blueberries, the frozen kind, that at some point my mom or I spaced and put them in the fridge instead of the freezer and I found them yesterday morning and went... DOH! I had about a 1/4 of a cup left and didn't want to waste them, so out came the eggs to dye naturally.
Here is the process...
Submerge your eggs in water, add 2 TBS vinegar, a hearty amount of salt and the blueberries. Smash up the blueberries to add more juice/dye to the water. Bring the water to a boil, cover and let sit for 20 minutes. Voila! Naturally dyed eggs!
Pictures to come soon!
Tuesday, March 19, 2013
A few of my favorite things
What have I been doing?
Knitting, sewing and the normal day to day stuff. I thought I'd take some time to share a few of my latest favorites
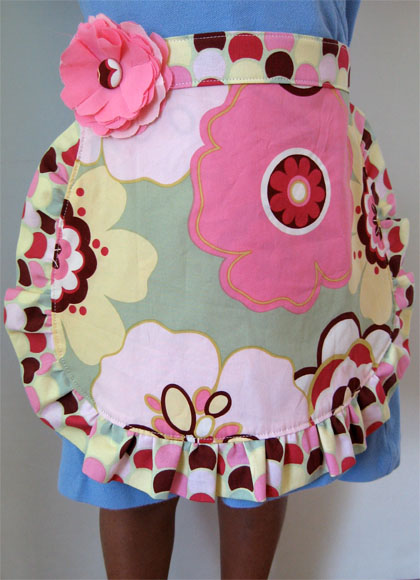
Sewing vintage looking aprons

The apron on the cover reminds me of one that my mother-in-law gave me shortly after meeting her. It's one that she made a long time ago. I love that the pattern book shares stories about each apron.
I've also been making a bunch of gardening aprons, which is essentially a BBQ apron. I make sure the pockets are super large. Here's a link to this pattern

It's from the Purl Bee, which not only has sewing patterns and tips, but has knitting, crocheting...you name it. I love their website.
Aprons are fun for little girls too, this website has a really cute pattern that you can whip up in an afternoon.

What have you been up to?
Knitting, sewing and the normal day to day stuff. I thought I'd take some time to share a few of my latest favorites
Sewing vintage looking aprons

The apron on the cover reminds me of one that my mother-in-law gave me shortly after meeting her. It's one that she made a long time ago. I love that the pattern book shares stories about each apron.
I've also been making a bunch of gardening aprons, which is essentially a BBQ apron. I make sure the pockets are super large. Here's a link to this pattern

It's from the Purl Bee, which not only has sewing patterns and tips, but has knitting, crocheting...you name it. I love their website.
Aprons are fun for little girls too, this website has a really cute pattern that you can whip up in an afternoon.
What have you been up to?
Tuesday, February 5, 2013
Messenger bag for boys...take your cars with you
There are a lot of girls in our family. I have two sisters, 3 daughters, 5 nieces and 9 great nieces. I have one grandson and we also have 2 great nephews. I made this bag for one of those little guys.
Let's hear it for the boys!
This is a twist on my previous messenger bag, seen here
Before I assembled the bag, I made an insert that holds toy cars.
I started with coordinating fabric, elastic and the usual sewing equipment. I used a few of my grandson's cars as a reference.

Next, lay the elastic across the fabric and pin the ends down.
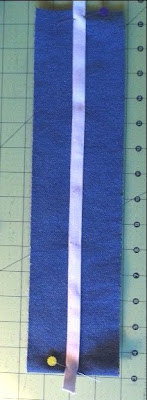
Next, mark your seam lines, I used the cars to help me determine the distance between my stitching.

Sew the stitches, I went back and forth several times with my machine.

Double check the distance between your stitching.

Assemble the interior of the messenger bag, you should have the pieces shown below.

We're going to make a big pocket on the inside too. The dimensions for my bag were 14x33" for the long section that forms the front and back. This piece was 30x18", folded in half to form a 15x9" pocket. The 15" will extend beyond the width of the portion that forms my bag, that's okay. We want to make sure we get the pocket in the seams that will form the bag. You can cut off the portion that extends beyond the seam allowance once you've attached the pocket to the interior portion of the bag.

Placement is important, I put mine down 2 inches from the top portion of my bag. I also marked with chalk the sections that I will sew down to divide this bad boy into two parts.

Position the previously sewn car pocket to the other side.

The interior section that forms your bag should look like this.

Sew down 1/4 inch on both sides then get ready to trim.

Sew your side pieces to the main portion of the interior of your bag. This is what it looks like when assembled.

Big pocket attached to interior of bag

That's it!
You can attach this completed section to the exterior portion to make a reversible bag.
This blog has a nice tutorial on how to sew the inside portion to the exterior portion, making the bag reversible.

Let's hear it for the boys!
This is a twist on my previous messenger bag, seen here
Before I assembled the bag, I made an insert that holds toy cars.
I started with coordinating fabric, elastic and the usual sewing equipment. I used a few of my grandson's cars as a reference.

Next, lay the elastic across the fabric and pin the ends down.

Next, mark your seam lines, I used the cars to help me determine the distance between my stitching.

Sew the stitches, I went back and forth several times with my machine.

Double check the distance between your stitching.

Assemble the interior of the messenger bag, you should have the pieces shown below.

We're going to make a big pocket on the inside too. The dimensions for my bag were 14x33" for the long section that forms the front and back. This piece was 30x18", folded in half to form a 15x9" pocket. The 15" will extend beyond the width of the portion that forms my bag, that's okay. We want to make sure we get the pocket in the seams that will form the bag. You can cut off the portion that extends beyond the seam allowance once you've attached the pocket to the interior portion of the bag.

Placement is important, I put mine down 2 inches from the top portion of my bag. I also marked with chalk the sections that I will sew down to divide this bad boy into two parts.

Position the previously sewn car pocket to the other side.

The interior section that forms your bag should look like this.

Sew down 1/4 inch on both sides then get ready to trim.

Sew your side pieces to the main portion of the interior of your bag. This is what it looks like when assembled.

Big pocket attached to interior of bag

That's it!
You can attach this completed section to the exterior portion to make a reversible bag.
This blog has a nice tutorial on how to sew the inside portion to the exterior portion, making the bag reversible.
Thursday, January 24, 2013
Christmas gift cards
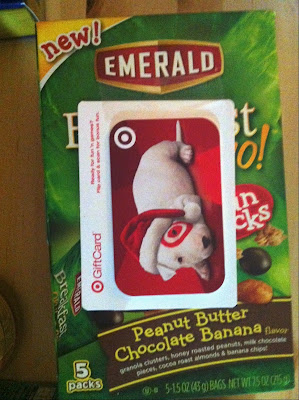
I have 3 adult daughters, one in college the other 2 are living in their own homes. It's pretty easy to find gifts for the two older daughters as they live close and I am good at listening for hints. When I asked my youngest daughter (21) what she wanted for Christmas she said something to this effect "food, I'm a poor broke college student". So true, but wrapping up a month's worth or groceries isn't very practical. I decided to buy a few of her favorite treats and attach gift cards to Target (they have food now) and a few other fun places.


How do you disguise your gift cards?


How do you disguise your gift cards?
Tuesday, January 22, 2013
De-junking my body...21day cleanse
A few months ago one of my nieces posted that she was going to do a 21 day cleanse. That's crazy, I thought, but I was intrigued. I didn't want to commit to 21 days (what a chicken) so I did a 3 day detox a la Dr. Oz. it was rough, I felt like crap (toxins leaving my body/withdrawal symptoms) and craved protein. Afterwards I felt great. I decided to continue to have a green smoothie once a day and limit processed food.
Let me interrupt my story and mention that I've been suffering from inflammation in both hands for 3 years, to the point of not knitting for over a year. My doctor had suggested that I eliminate sugars and gluten from my diet as they may be contributing to my hand inflammation. I thought that was crazy too, I've been eating this stuff all of my life, why would I suddenly have a problem with sugars and gluten...oh yeah, I'm getting older, stuff starts to break down, that could be it.
My niece posted that she was going to do the 21 day detox again, right after the New Years. Anyone interested? Yuppers, I'm interested.
I checked out the rules and thought, I can do this. No sugars or sweeteners except stevia. No gluten...none! No dairy and no meat for the first 10 days.
I do have protein mixes at least 2 times a day and all of the veggies I can eat plus fruit (2 times more veggies than fruit).
I can do this! At day 11 you can add in fish or chicken for the remaining 10 days.
Well, it's day 15 and I'm pleased to say that it's going well. The inflammation in my hands has subsided to the point of me not noticing it. I even started to knit again...I'm sharing my story not because I intend on converting you, just wanted to say...
I STARTED TO KNIT AGAIN! I can hardly believe it.
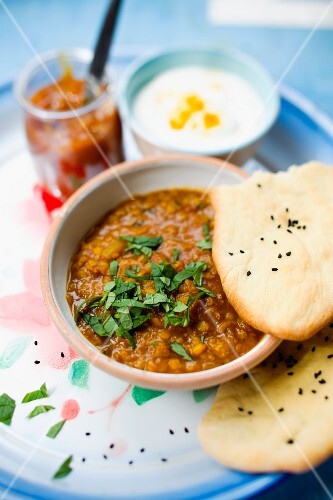
Enough ranting, here's a recipe I am enjoying.

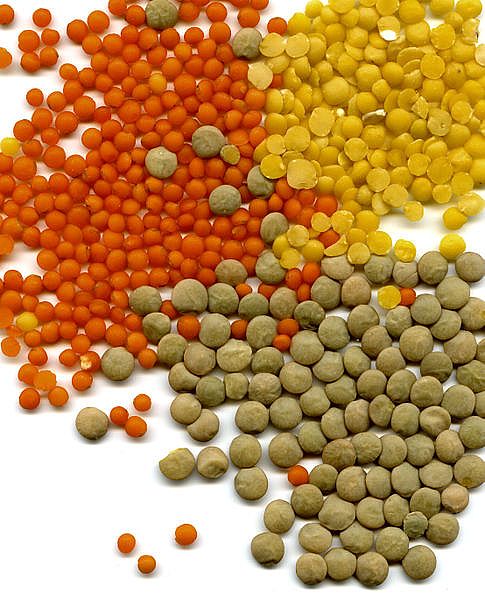
Spiced Lentils
2 cups lentils
1/2 onion, diced
1 diced fennel bulb
2 garlic cloves, sliced
1 teaspoon smoked paprika
1 teaspoon toasted fennel seed, ground
1 teaspoon toasted coriander seed, ground
1 bay leaf
Soak the lentils in water for 10 minutes. Rinse and pick through for stones. Coat the bottom of a pot with a generous layer of extra virgin olive oil. Sweat the onion and fennel until tender. Season with salt. Add garlic and spices and continue to cook for one minute. Add lentils and water to cover. Simmer until lentils are tender. If needed, more water
I cook mine down to resemble refried beans, about 45 minutes
You can find more lentil recipes here...I really enjoy the sweetness of the onions, we usually fry them up with some chopped up bacon. Salt and Pepper and simmer for 45 minutes to an hour.

Let me interrupt my story and mention that I've been suffering from inflammation in both hands for 3 years, to the point of not knitting for over a year. My doctor had suggested that I eliminate sugars and gluten from my diet as they may be contributing to my hand inflammation. I thought that was crazy too, I've been eating this stuff all of my life, why would I suddenly have a problem with sugars and gluten...oh yeah, I'm getting older, stuff starts to break down, that could be it.
My niece posted that she was going to do the 21 day detox again, right after the New Years. Anyone interested? Yuppers, I'm interested.
I checked out the rules and thought, I can do this. No sugars or sweeteners except stevia. No gluten...none! No dairy and no meat for the first 10 days.
I do have protein mixes at least 2 times a day and all of the veggies I can eat plus fruit (2 times more veggies than fruit).
I can do this! At day 11 you can add in fish or chicken for the remaining 10 days.
Well, it's day 15 and I'm pleased to say that it's going well. The inflammation in my hands has subsided to the point of me not noticing it. I even started to knit again...I'm sharing my story not because I intend on converting you, just wanted to say...
I STARTED TO KNIT AGAIN! I can hardly believe it.
Enough ranting, here's a recipe I am enjoying.
Spiced Lentils
2 cups lentils
1/2 onion, diced
1 diced fennel bulb
2 garlic cloves, sliced
1 teaspoon smoked paprika
1 teaspoon toasted fennel seed, ground
1 teaspoon toasted coriander seed, ground
1 bay leaf
Soak the lentils in water for 10 minutes. Rinse and pick through for stones. Coat the bottom of a pot with a generous layer of extra virgin olive oil. Sweat the onion and fennel until tender. Season with salt. Add garlic and spices and continue to cook for one minute. Add lentils and water to cover. Simmer until lentils are tender. If needed, more water
I cook mine down to resemble refried beans, about 45 minutes
You can find more lentil recipes here...I really enjoy the sweetness of the onions, we usually fry them up with some chopped up bacon. Salt and Pepper and simmer for 45 minutes to an hour.
Subscribe to:
Posts (Atom)