Let's hear it for the boys!
This is a twist on my previous messenger bag, seen here
Before I assembled the bag, I made an insert that holds toy cars.
I started with coordinating fabric, elastic and the usual sewing equipment. I used a few of my grandson's cars as a reference.
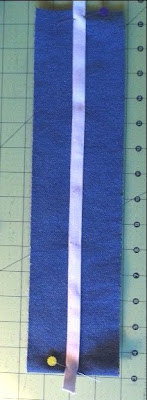
Next, lay the elastic across the fabric and pin the ends down.
Next, mark your seam lines, I used the cars to help me determine the distance between my stitching.
Sew the stitches, I went back and forth several times with my machine.
Double check the distance between your stitching.
Assemble the interior of the messenger bag, you should have the pieces shown below.
We're going to make a big pocket on the inside too. The dimensions for my bag were 14x33" for the long section that forms the front and back. This piece was 30x18", folded in half to form a 15x9" pocket. The 15" will extend beyond the width of the portion that forms my bag, that's okay. We want to make sure we get the pocket in the seams that will form the bag. You can cut off the portion that extends beyond the seam allowance once you've attached the pocket to the interior portion of the bag.
Placement is important, I put mine down 2 inches from the top portion of my bag. I also marked with chalk the sections that I will sew down to divide this bad boy into two parts.
Position the previously sewn car pocket to the other side.
The interior section that forms your bag should look like this.
Sew down 1/4 inch on both sides then get ready to trim.
Sew your side pieces to the main portion of the interior of your bag. This is what it looks like when assembled.
Big pocket attached to interior of bag
That's it!
You can attach this completed section to the exterior portion to make a reversible bag.
This blog has a nice tutorial on how to sew the inside portion to the exterior portion, making the bag reversible.


